 Spotify→
 Audiomack
Trasferire da Spotify a Audiomack
Sposta playlist, brani preferiti, album salvati e artisti seguiti da Spotify a Audiomack senza ricostruire nulla a mano. Collega entrambi gli account, scegli cosa spostare e FreeYourMusic ricrea tutto su Audiomack con gli stessi nomi e lo stesso ordine dei brani.
★★★★★ 4,7 · oltre 12 Mln di download · Password mai condivisa


Perché passare da Spotify a Audiomack?
FreeYourMusic sposta playlist, brani preferiti, album salvati e artisti seguiti da Spotify a Audiomack. Abbina i brani uno per uno ed elenca tutto ciò che non è su Audiomack, così puoi sistemarlo prima di cambiare servizio.
Trasferimenti supportati
Playlist (con nomi e ordine originali), Brani preferiti, Album salvati e Artisti seguiti
Controlla i brani mancanti
I cataloghi sono diversi. Controlla i risultati del trasferimento per vedere quali brani non sono stati trovati sul servizio di destinazione.
Come trasferire le playlist da Spotify a Audiomack
Quattro passaggi. Gli stessi su iPhone, Android, Mac, Windows e Linux.
Risposta rapida
Per trasferire Spotify su Audiomack, installa FreeYourMusic, seleziona Spotify come origine e Audiomack come destinazione, scegli le playlist che vuoi e avvia il trasferimento. L'app trova ogni brano su Audiomack ed elenca quelli che non è riuscita ad abbinare.
- 1
Collega Spotify come origine
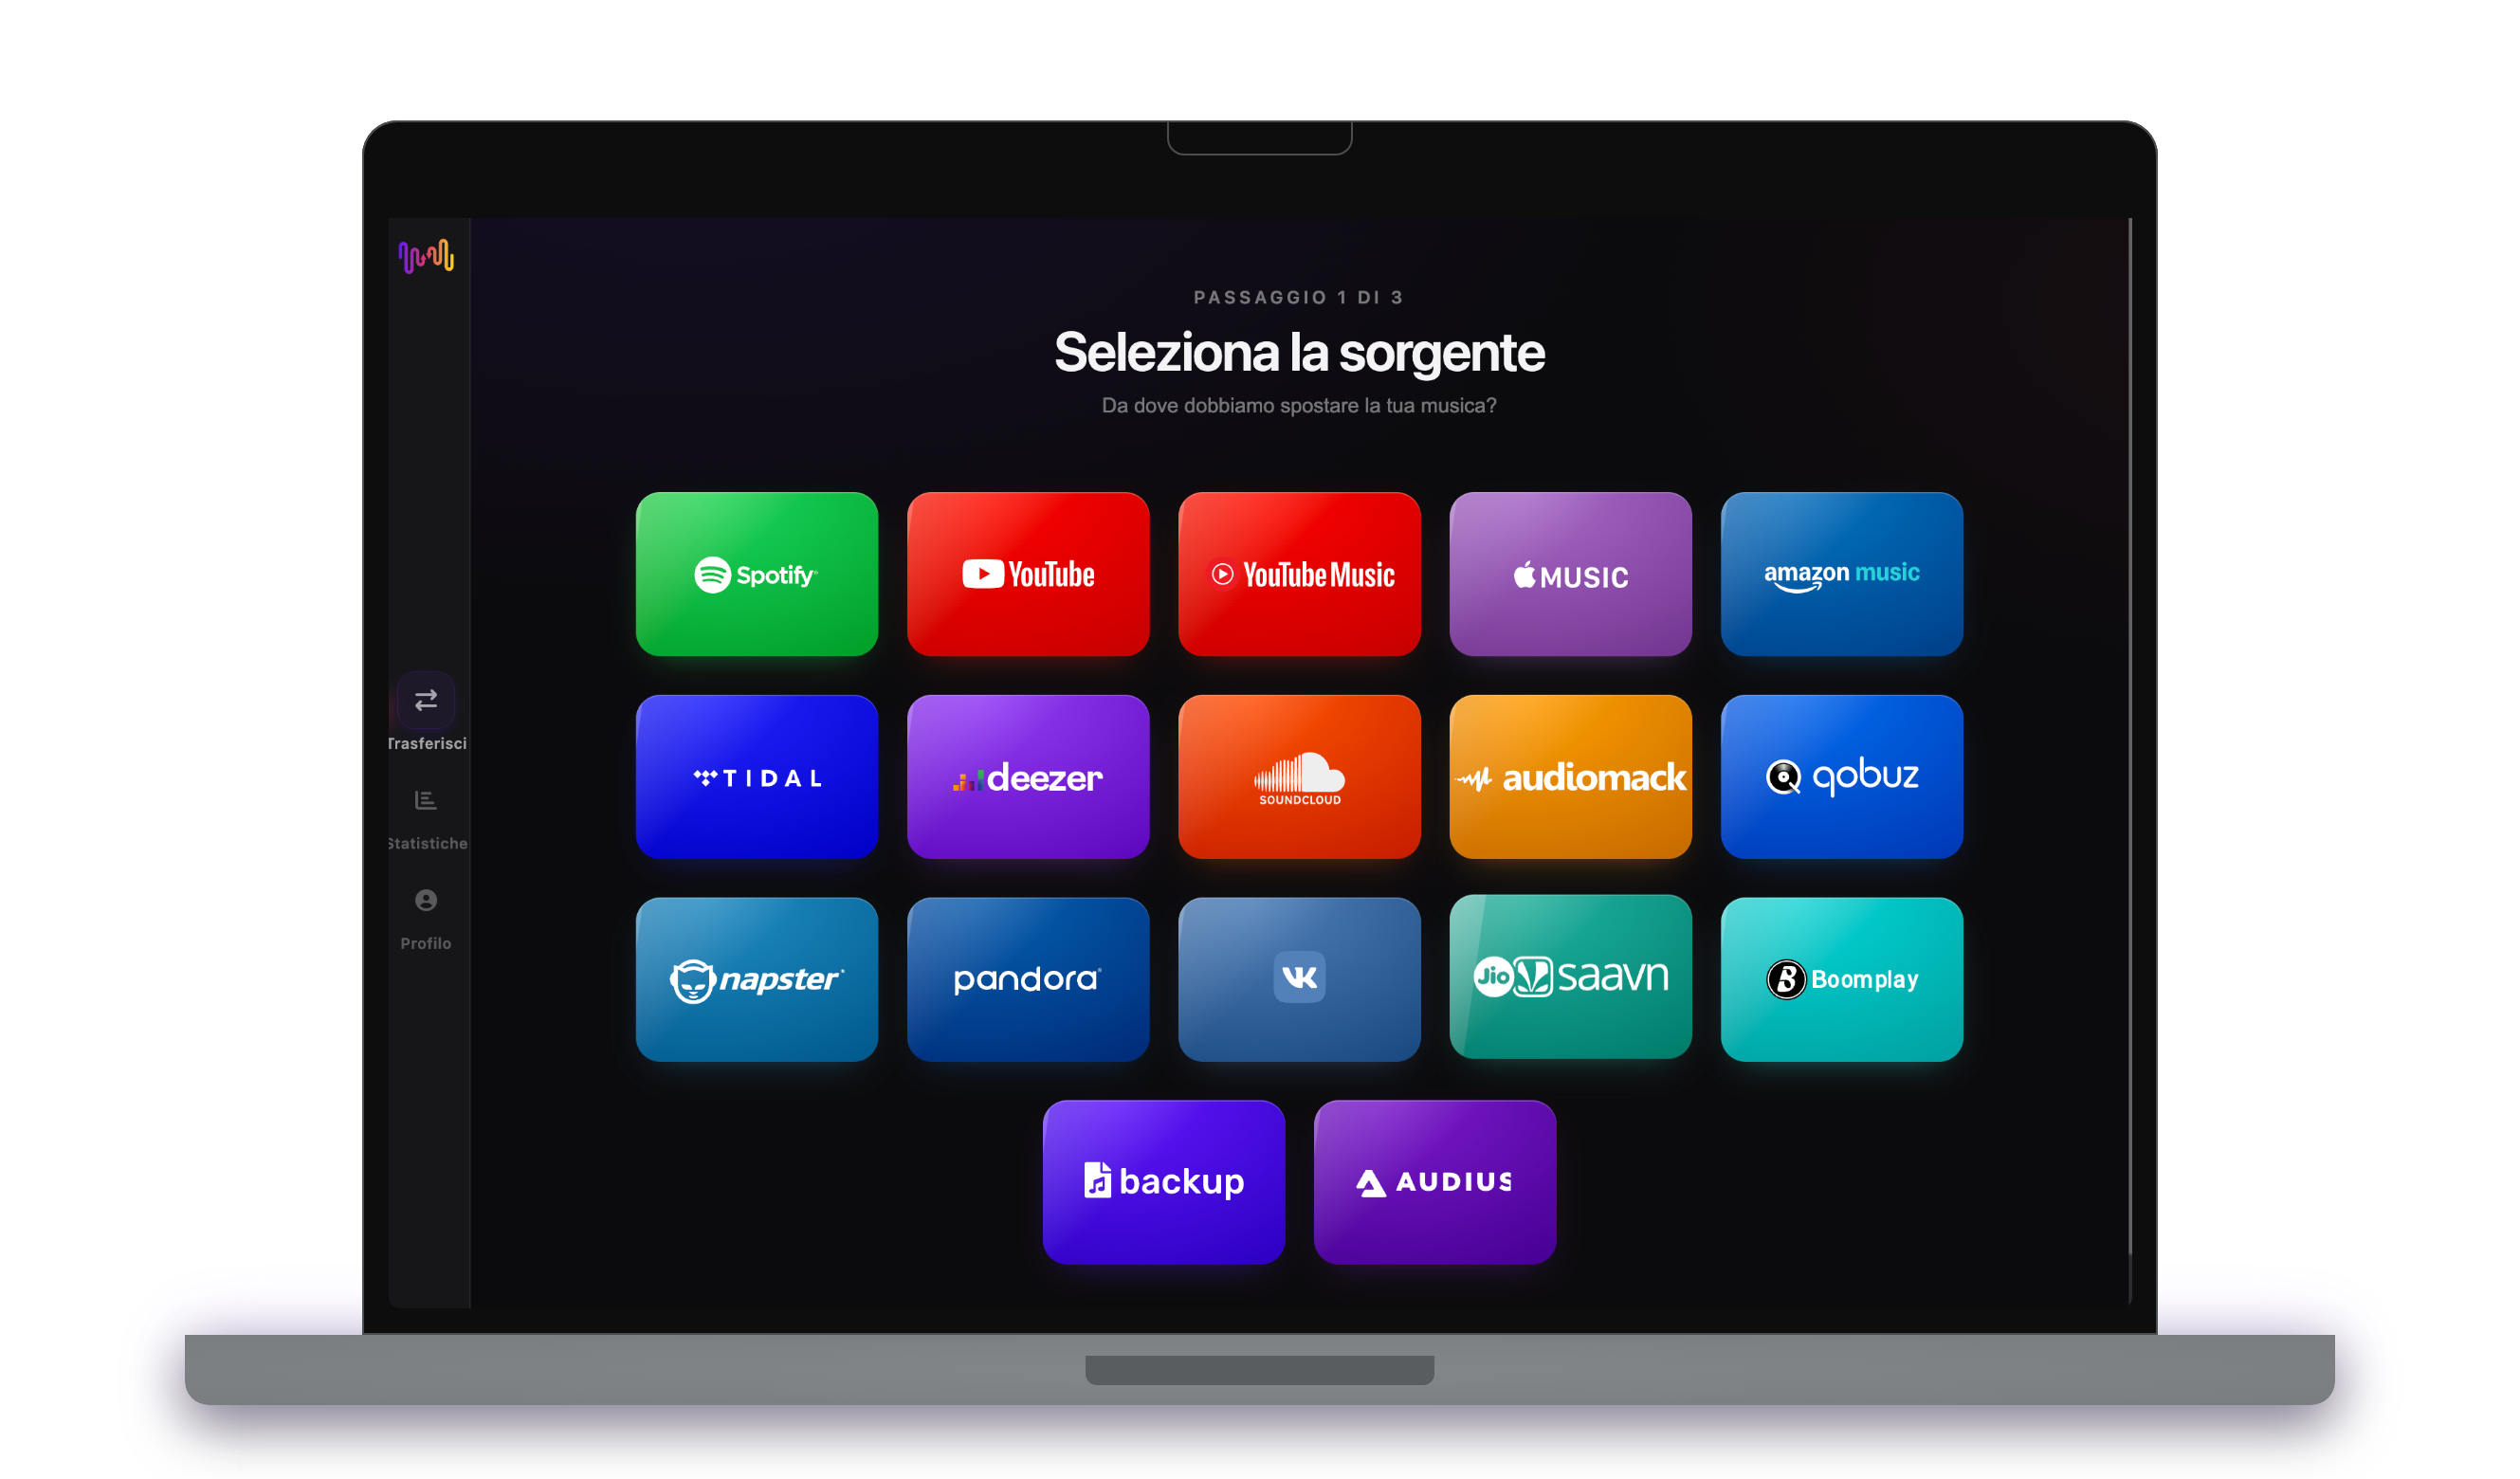
Apri FreeYourMusic, tocca il riquadro Spotify nella schermata "Seleziona la sorgente" e accedi dalla pagina di login di Spotify. FreeYourMusic non memorizza la tua password di Spotify.
- 2
Scegli Audiomack come destinazione
Nella schermata "Seleziona destinazione", tocca Audiomack e accedi. FreeYourMusic ha bisogno di accedere alla tua libreria Audiomack per creare lì le playlist.
- 3
Scegli cosa spostare
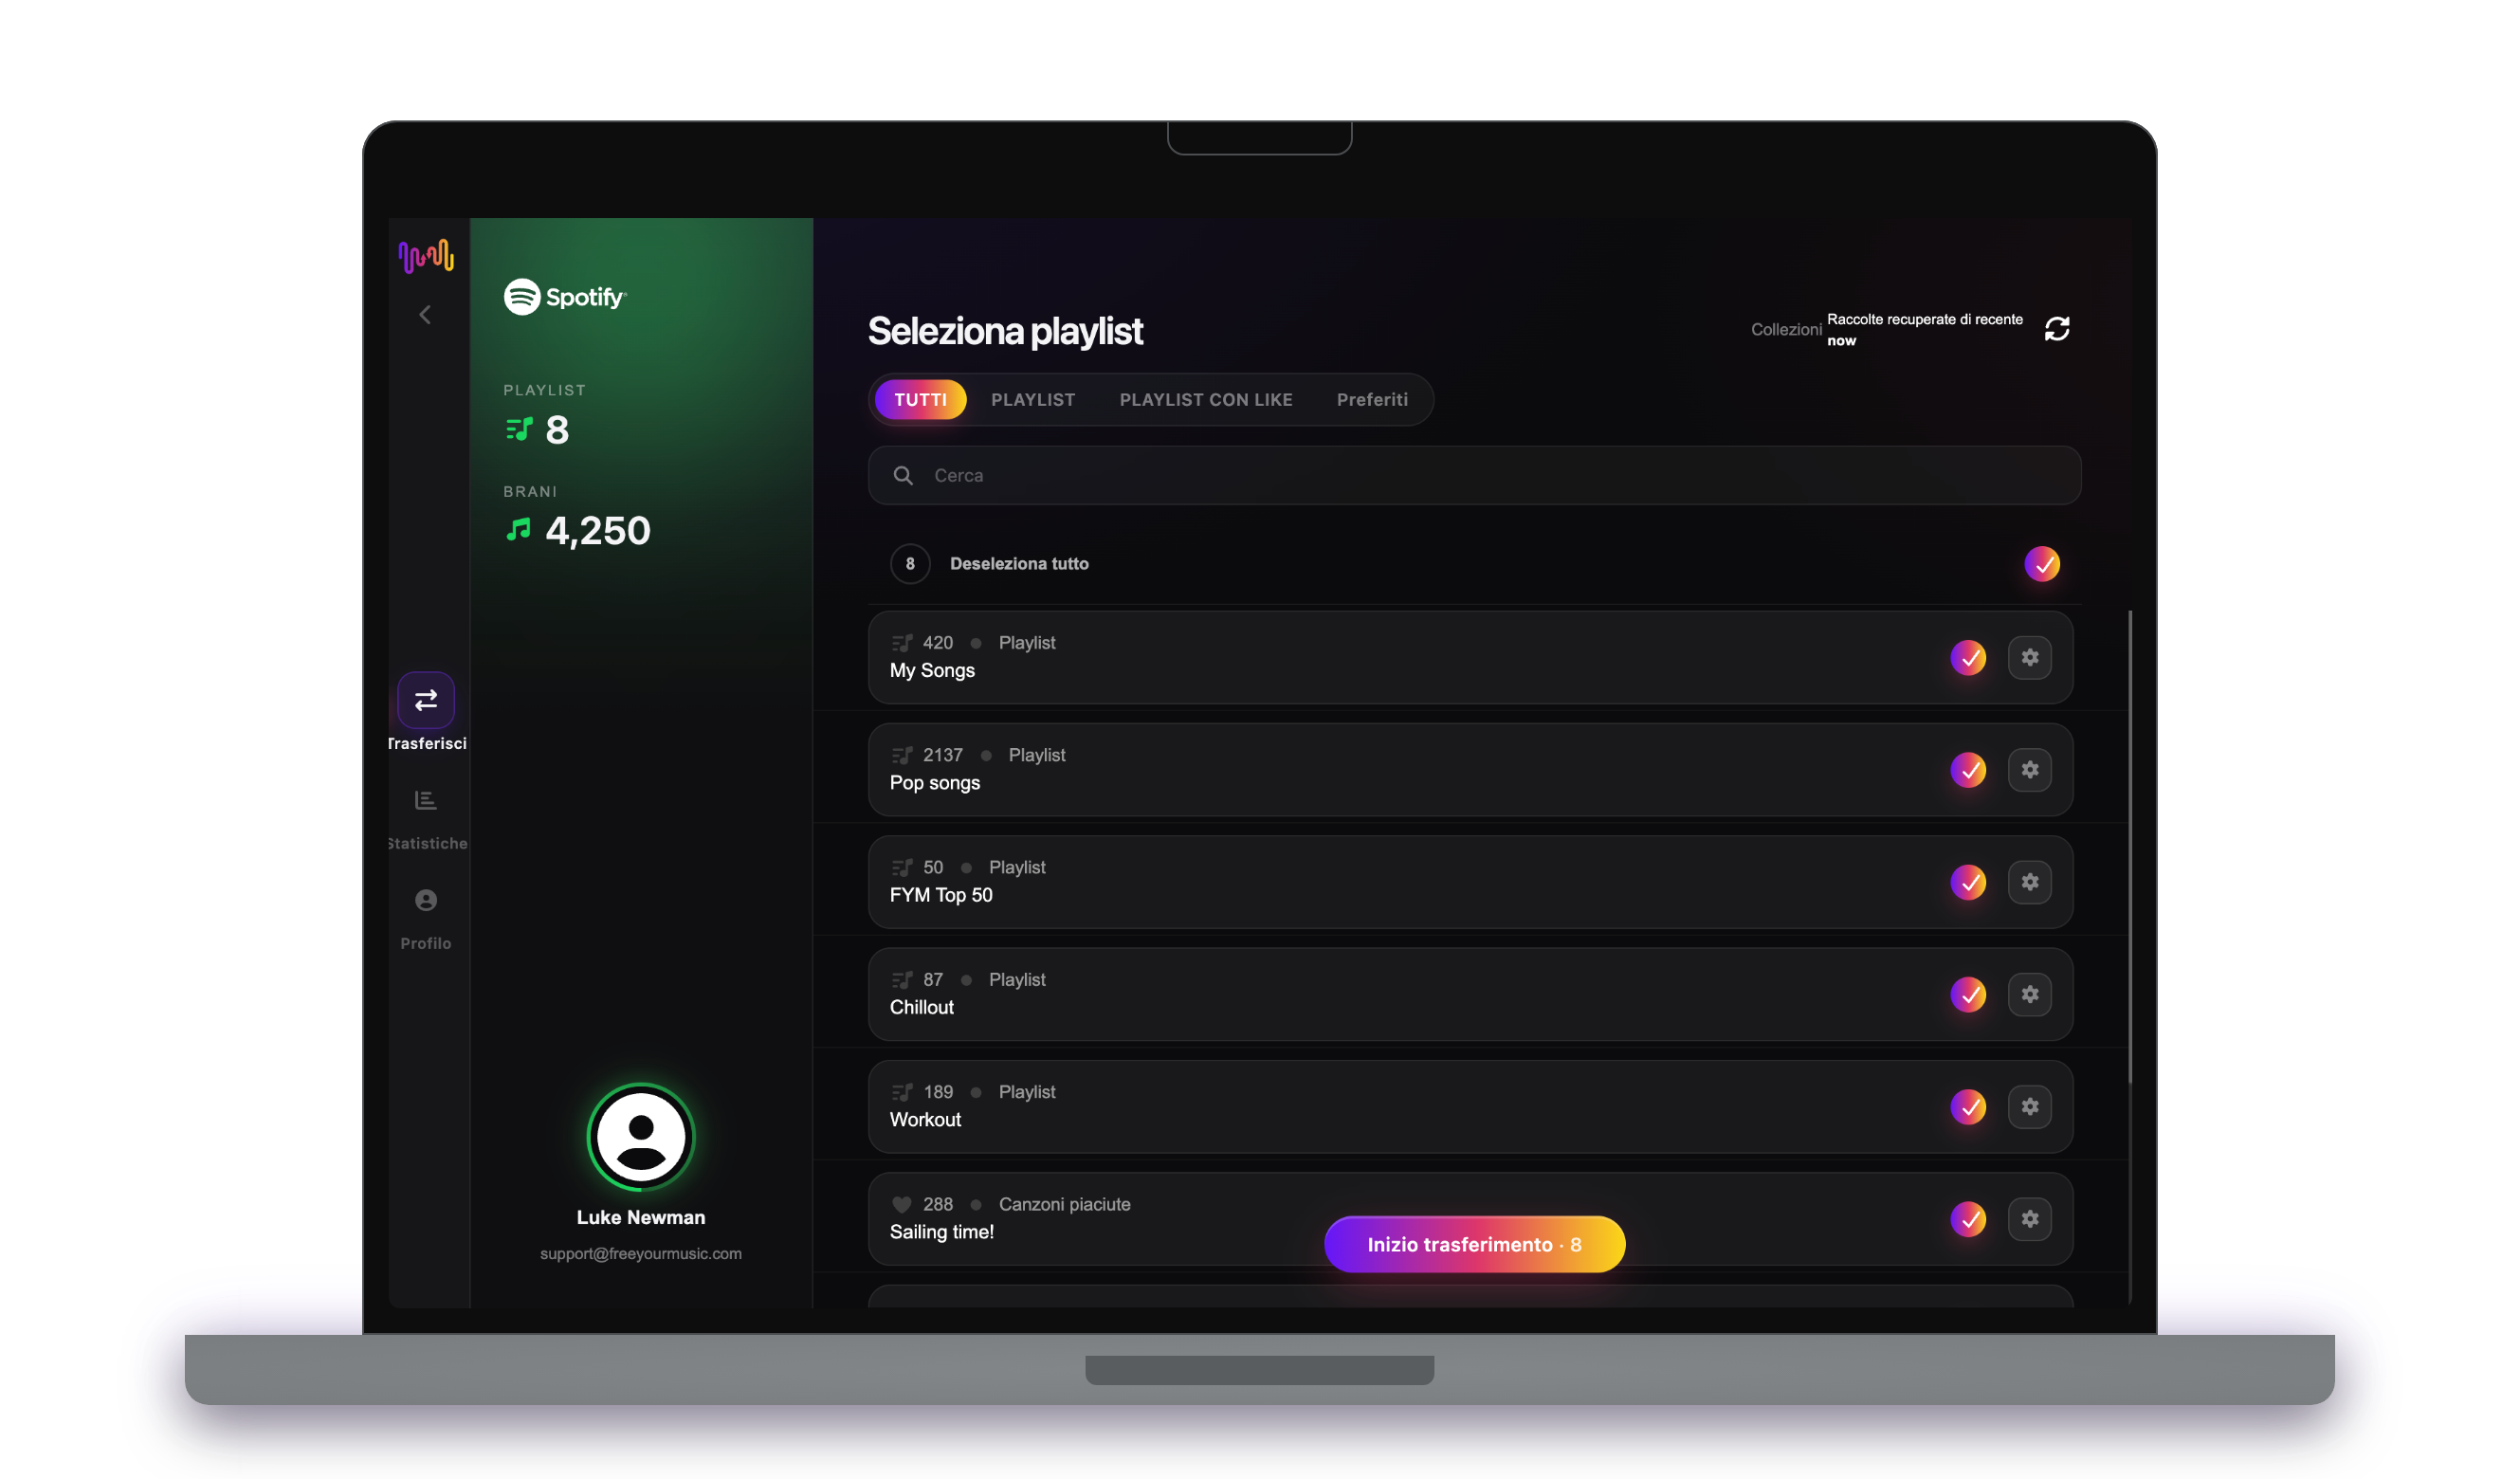
Seleziona le playlist che vuoi su Audiomack. Usa i filtri e il campo di ricerca per trovarle, oppure seleziona tutto per spostare l'intera libreria Spotify in una volta.
- 4
Avvia il trasferimento e controlla i risultati
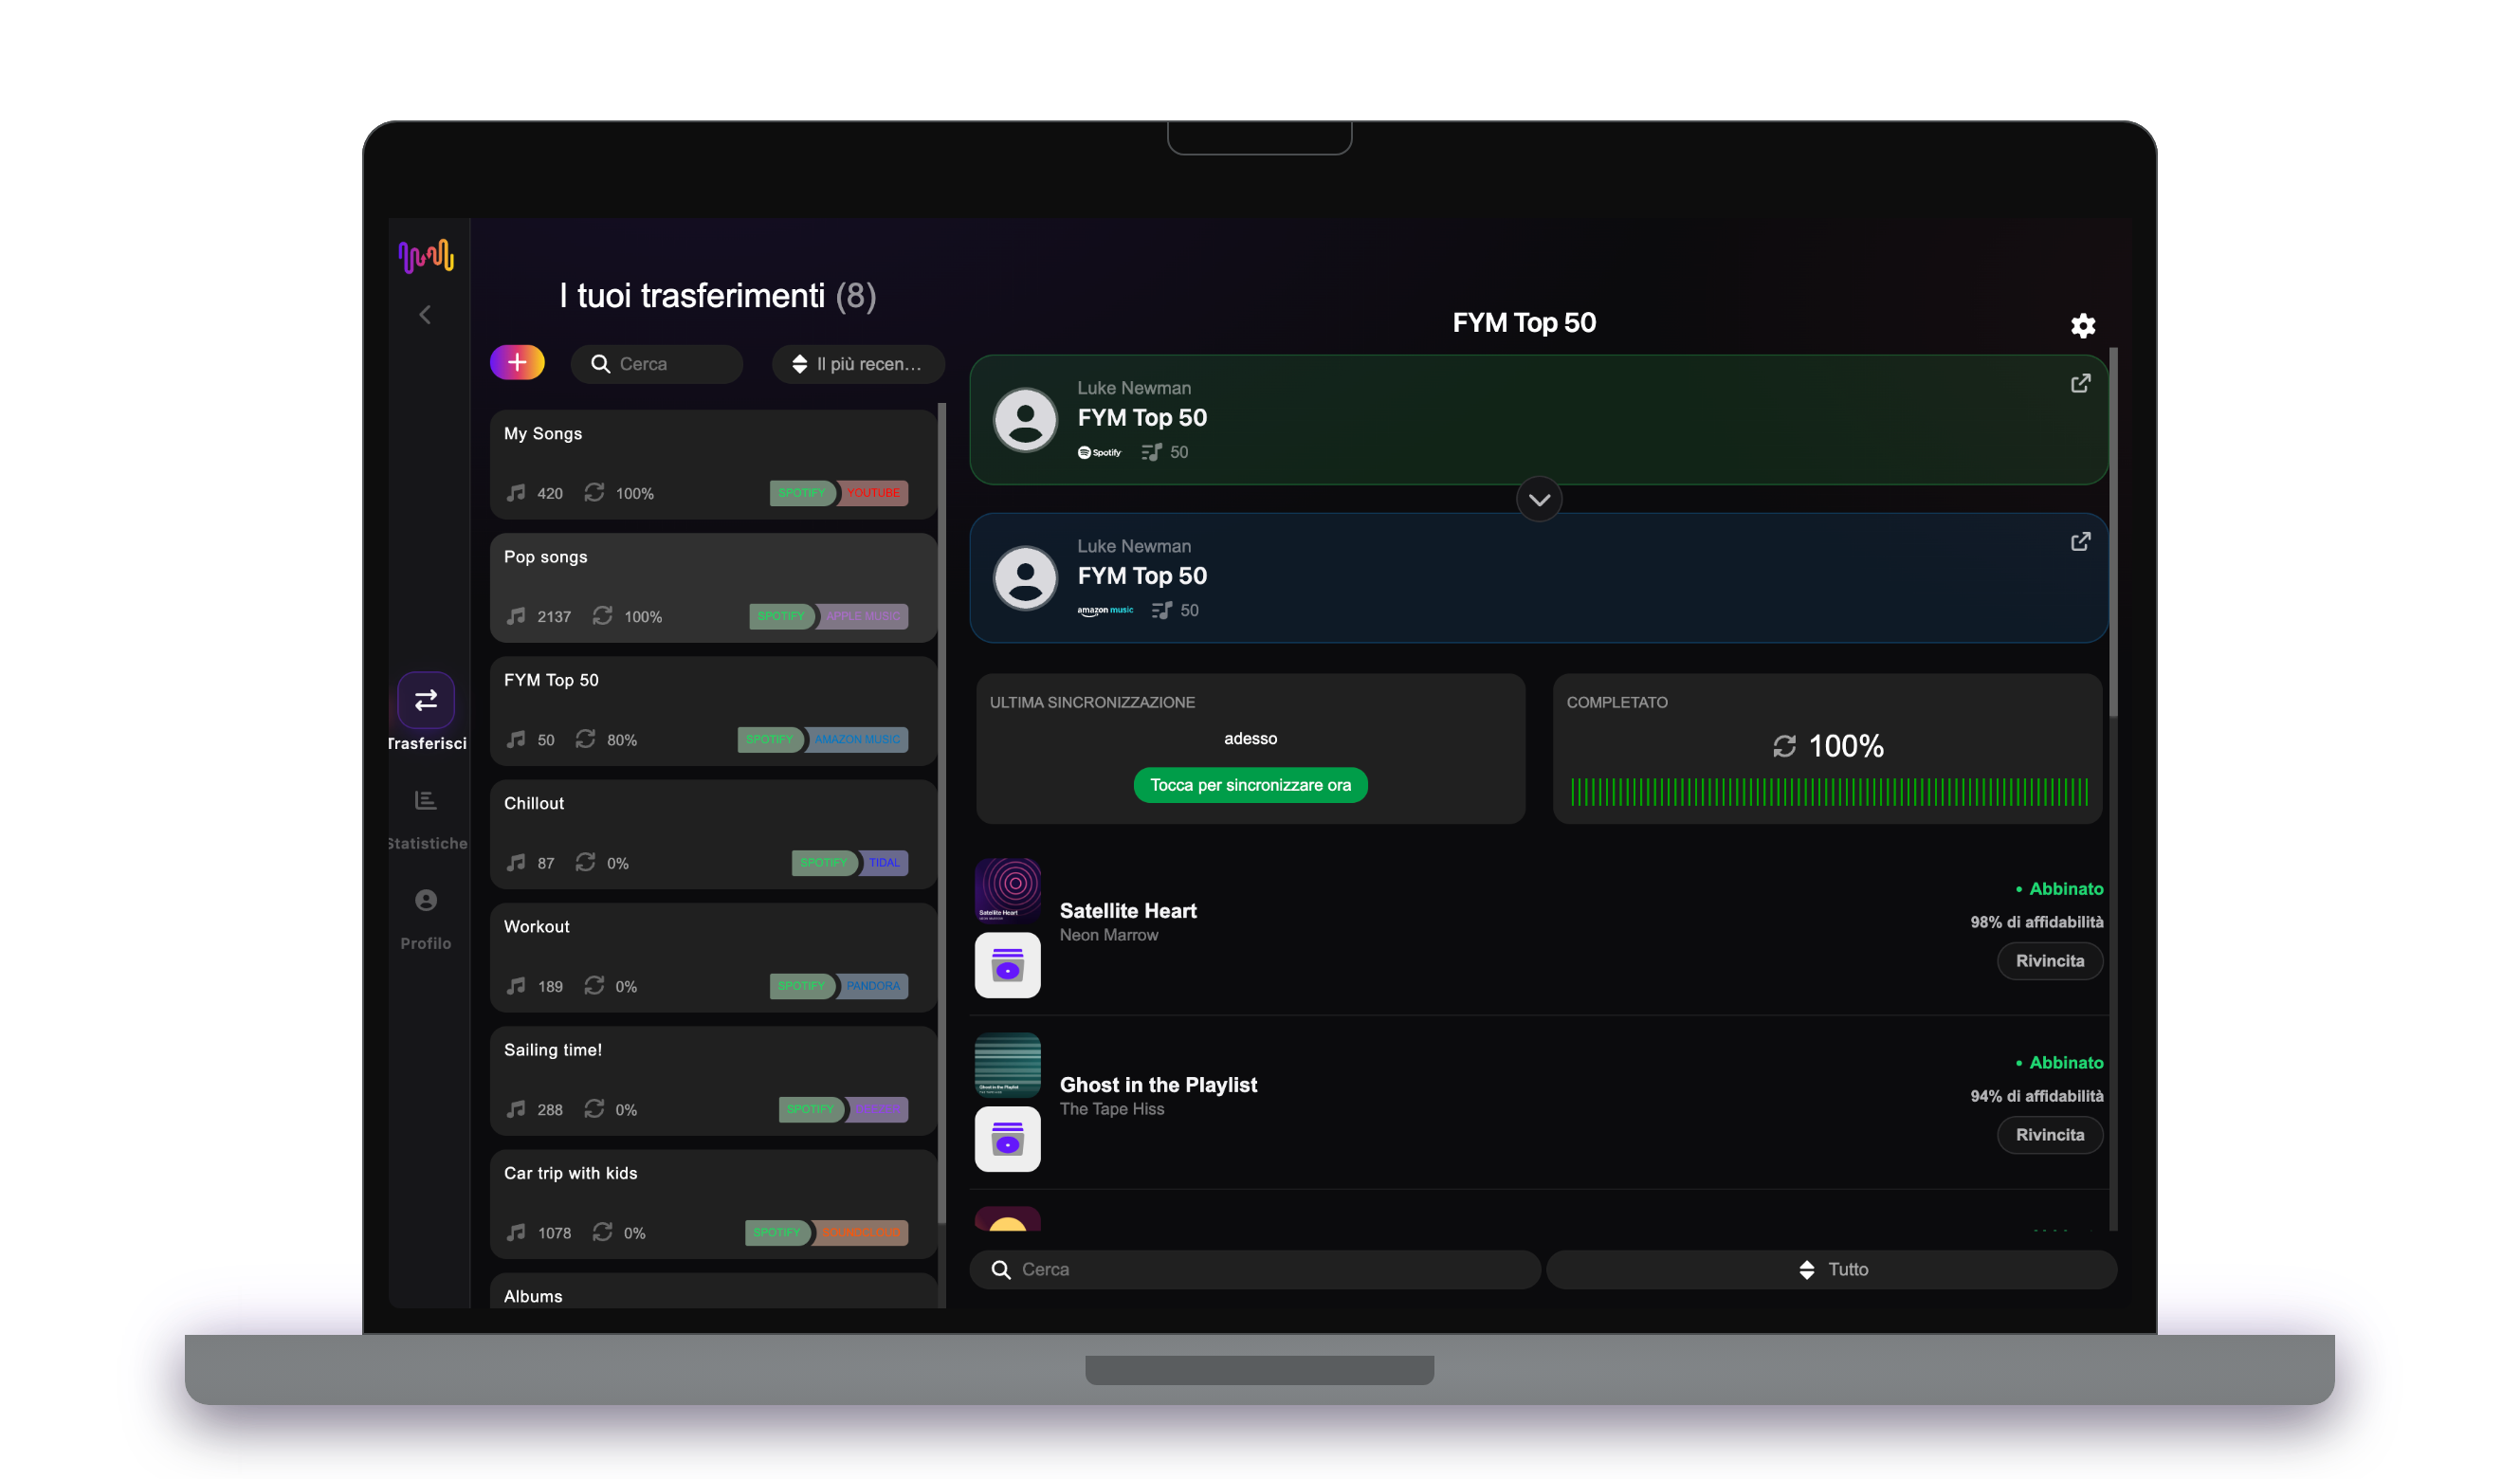
Tocca "Inizio trasferimento". FreeYourMusic abbina ogni brano su Audiomack, mantiene i nomi delle playlist e l'ordine dei brani e mostra un punteggio di affidabilità per ogni abbinamento. Usa Rematch per sistemare i brani che non ha trovato.
Da sapere prima di passare da Spotify a Audiomack
Spotify come origine
Basta un account Spotify gratuito. Spotify non consente alle app di leggere le playlist che crea per te, come i mix personalizzati: copia prima i loro brani in una tua playlist.
Cosa viene trasferito da Spotify a Audiomack
Su ogni dispositivo
Spostare, convertire o importare: un solo trasferimento da Spotify a Audiomack
Comunque tu lo chiami, il lavoro è lo stesso. Puoi spostare le tue playlist di Spotify su Audiomack, convertire una playlist di Spotify in una playlist di Audiomack o importare la tua libreria Spotify in Audiomack. FreeYourMusic fa tutte e tre le cose in un solo trasferimento, per una singola playlist o per una libreria di migliaia di brani.
Mantieni Spotify e Audiomack sincronizzati
Aggiungi ancora brani su Spotify? Con Premium, Auto-Sync controlla le playlist trasferite e aggiunge automaticamente i brani nuovi su Audiomack, così le due librerie restano uguali. Prezzi →
Passa da Spotify a un altro servizio



Vedi tutti i trasferimenti da Spotify →
Trasferisci su Audiomack da un altro servizio
Domande frequenti
Come trasferisco la mia playlist da Spotify a Audiomack?
Per trasferire Spotify su Audiomack, installa FreeYourMusic, seleziona Spotify come origine e Audiomack come destinazione, scegli le playlist che vuoi e avvia il trasferimento. L'app trova ogni brano su Audiomack ed elenca quelli che non è riuscita ad abbinare.
Cosa viene trasferito esattamente da Spotify a Audiomack?
FreeYourMusic sposta playlist, brani preferiti, album salvati e artisti seguiti da Spotify a Audiomack. Abbina i brani uno per uno ed elenca tutto ciò che non è su Audiomack, così puoi sistemarlo prima di cambiare servizio.
Spotify può spostare le mie playlist su Audiomack?
No. Lo strumento di importazione di Spotify porta la musica solo su Spotify. Non può inviare le tue playlist a un altro servizio. Per spostare le tue playlist di Spotify su Audiomack, usa FreeYourMusic.
Posso trasferire le playlist da Spotify a Audiomack gratuitamente?
Sì — il piano gratuito sposta 300 brani senza bisogno di carta, e ne ottieni altri 300 dopo una registrazione gratuita con email. Passa a Premium per trasferimenti illimitati, Auto-Sync e Cloud Backup.
Cosa succede ai brani che non sono su Audiomack?
I cataloghi cambiano da un servizio all'altro e da un paese all'altro. FreeYourMusic elenca ogni brano che non è riuscito ad abbinare su Audiomack, così puoi scegliere un'altra versione con Rematch oppure saltarlo. Niente viene scartato senza che tu lo veda.
Le mie playlist di Spotify verranno eliminate?
No. FreeYourMusic copia la tua musica su Audiomack e lascia la tua libreria Spotify così com'è. Decidi tu in seguito se tenere o disdire il tuo account Spotify.
Quanto dura un trasferimento da Spotify a Audiomack?
La maggior parte delle playlist si trasferisce in pochi minuti. Le librerie grandi richiedono più tempo, perché la durata dipende dal numero di brani e dai limiti di Spotify e Audiomack. Puoi continuare a usare il dispositivo mentre il trasferimento è in corso.
Posso trasferire Spotify su Audiomack dallo smartphone?
Sì. FreeYourMusic funziona su iPhone, iPad e Android, e sui computer Mac, Windows e Linux. I passaggi sono gli stessi su ogni dispositivo.
Pronto a passare a Audiomack?
Scarica FreeYourMusic e sposta l'intera libreria in pochi minuti.
Scarica gratis →