How to Transfer Spotify Playlists to Apple Music
September 1, 2025

Key takeaway
Transfer your Spotify playlists, albums, and liked songs to Apple Music in minutes with Free Your Music. Connect both accounts, pick what you want to move, and the app handles the rest. Your first 300 songs are free, making it the fastest way to switch to Apple Music without losing your playlists.
Ready to transfer your Spotify playlists to Apple Music? With Free Your Music, you can move your playlists, keeping every track intact, while enjoying Apple Music's superior sound quality and perfect device integration.
You’re here because you’re considering making the switch from Spotify to Apple Music, and let’s be honest, it’s probably time. Whether you’re chasing better sound quality, looking for tighter Apple device integration, or just fed up with Spotify’s limitations, switching to Apple Music could be your best move in 2025.
But… what about your playlists? You’ve invested time and energy curating those perfect collections. Don’t worry, we’ve got you covered.
Using Free Your Music, you can transfer your playlists from Spotify to Apple Music without a hitch.
It’s fast, easy, and best of all? Your first 300 songs are free.
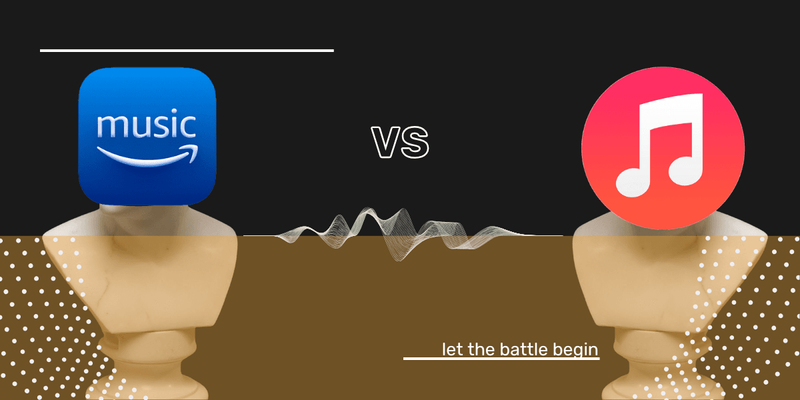
Why Even Think About Switching? Spotify vs. Apple Music
Spotify is a great platform, no doubt. But for those who really live their music—whether it’s getting lost in the beats or wanting every track in the highest possible quality—Apple Music is on another level. Here’s why:

1. Sound That Hits Different
Apple Music’s lossless audio and spatial sound aren’t just buzzwords—they deliver richer, crisper, more immersive listening. For context, Spotify Premium tops out at 320 kbps, while Apple Music offers lossless up to 24-bit/192 kHz. If you care about hearing music in its truest form, Apple Music blows Spotify out of the water.
Alright, but What Is Spatial Audio?.
2. Apple Device Love
If you’re using an iPhone, Mac, Apple Watch, or AirPods, Apple Music is designed to work with them seamlessly. Want Siri to control your playlist while your phone’s in your bag? Done. Want to sync your playlists across all your devices without lifting a finger? Easy. Apple Music plays beautifully with Apple devices, and for Apple users, that’s unbeatable.
Apple Music also got some real nice upgrades with iOS18. Enhanced Control, Accessibility, and Sharing.
3. Exclusive Music You Can’t Miss
Imagine being able to access exclusive albums, live performances, and early releases from some of the biggest names in music. Apple Music gives you that edge. Whether it’s Taylor Swift, Drake, or Beyoncé, the top artists often drop content first on Apple Music, leaving Spotify users playing catch-up.
One thing that sometimes annoys users is the need to set up sleep timers manually, but we got you covered: How to Set a Sleep Timer in Apple Music.
How to Transfer Playlists with Free Your Music
You’ve spent months, maybe even years, curating those perfect playlists on Spotify. Moving those by hand? No thanks. That’s where Free Your Music steps in. We do the hard work for you, letting you transfer your playlists in just a few clicks. No missing songs, no tedious manual search-and-add drama.
Step-by-Step
- Download Free Your Music from the official website.
- Log into your Spotify account through the app.
- Select Apple Music as your new home.
- Pick the playlists you want to move.
- Hit “Begin Transfer,” sit back, and let Free Your Music do its thing.
The first 300 songs are free, so you can transfer a good chunk of your library without paying a cent. Got more than 300? Upgrading to the paid version unlocks unlimited transfers, so you can bring your entire music collection with you.

Why Not Just Transfer Music Manually?
Ah, the manual method. In theory, you could search for each song on Apple Music, build your playlists one by one, and repeat this process until your entire collection is moved over. But let’s be real: who has time for that?
Here’s why Free Your Music is your lifesaver:
- Speed: A few clicks and your playlists are transferred, sorted, and ready to play on Apple Music.
- Accuracy: Manual transferring is prone to mistakes, missing tracks, wrong versions. Free Your Music reduces that risk.
- Time Saver: Instead of wasting hours (or days) transferring song by song, automate the process. Free Your Music does in minutes what would take you days manually.
Skip the frustration. Let Free Your Music do the heavy lifting while you enjoy the perks of Apple Music.
Manual Transfer vs. Free Your Music: A Quick Comparison
| Manual Transfer | Free Your Music | |
|---|---|---|
| Time | Slow and painful—add songs one by one | Done in a few clicks, minutes not hours |
| Accuracy | Prone to errors, missing tracks | Almost flawless, songs stay in order |
| Effort | Requires full attention | Set it and forget it—let the app do it |
| Cost | Free, but costs your sanity | First 300 songs free, paid for unlimited |
Can I Transfer My Entire Spotify Library to Apple Music?
Yes, you can transfer your entire playlist library from Spotify to Apple Music. Whether it’s your playlists, liked songs, or albums, Free Your Music makes it easy.
Even better? It keeps your playlist order intact, so your tracks are ready to go as soon as the transfer is complete.
How to Transfer Your Entire Library (Windows & Mac)
- Open Free Your Music on your desktop.
- Log into Spotify and select all your playlists, albums, and liked songs.
- Choose Apple Music as the destination.
- Start the transfer, and let Free Your Music handle the rest.
Sit back, grab a coffee, and in just a few minutes, your entire music library will be live on Apple Music, ready to stream.
Spotify vs. Apple Music: Which Is Right for You?
Here’s the comparison table between Spotify Premium and Apple Music:
| Spotify Premium | Apple Music | |
|---|---|---|
| Free Plan | Yes, ad-supported | No free tier (1-month trial available) |
| Audio Quality | Max: 320 kbps | Lossless & Spatial Audio |
| Exclusive Content | Limited exclusives | Exclusive artist releases, early access |
| Apple Integration | None | Seamless across all Apple devices |
| Subscription | $11.99/month | $10.99/month |
For audiophiles and those already embedded in the Apple ecosystem, the choice is clear, Apple Music offers superior audio with lossless and spatial sound, delivering a richer and more immersive experience.
Spotify Premium has its merits (it is packed with features), especially for curated playlists like Discover Weekly, but it can’t compete with Apple Music’s audio fidelity.
FAQs
Will my playlists transfer in the same order?
Yes. Free Your Music keeps the original order of your playlists, so everything stays exactly the way you organized it.
Is Free Your Music safe?
Yes. Free Your Music uses secure connections via official APIs and doesn’t store your login details.
What if some songs aren’t available on Apple Music?
If a track isn’t available, Free Your Music will notify you. This happens rarely since Apple Music’s catalog is vast and extensive.
Can I transfer liked songs too?
Yes. Free Your Music allows you to transfer liked songs, albums, and playlists from Spotify to Apple Music without hassle.
Check out our FAQ page for more: Free Your Music FAQS.
Start Your Spotify to Apple Music Transfer
You deserve the best music experience. Apple Music offers better sound, exclusive content, and seamless integration with your Apple devices. And with Free Your Music, you can transfer your playlists in just minutes.
Your first 300 songs are free, so what are you waiting for?
Take the leap, make the switch, and let Free Your Music do the work. Start your transfer here and enjoy Apple Music in minutes.
What's next?
Migrate from and to any music services


Most popular Apple Music transfers: