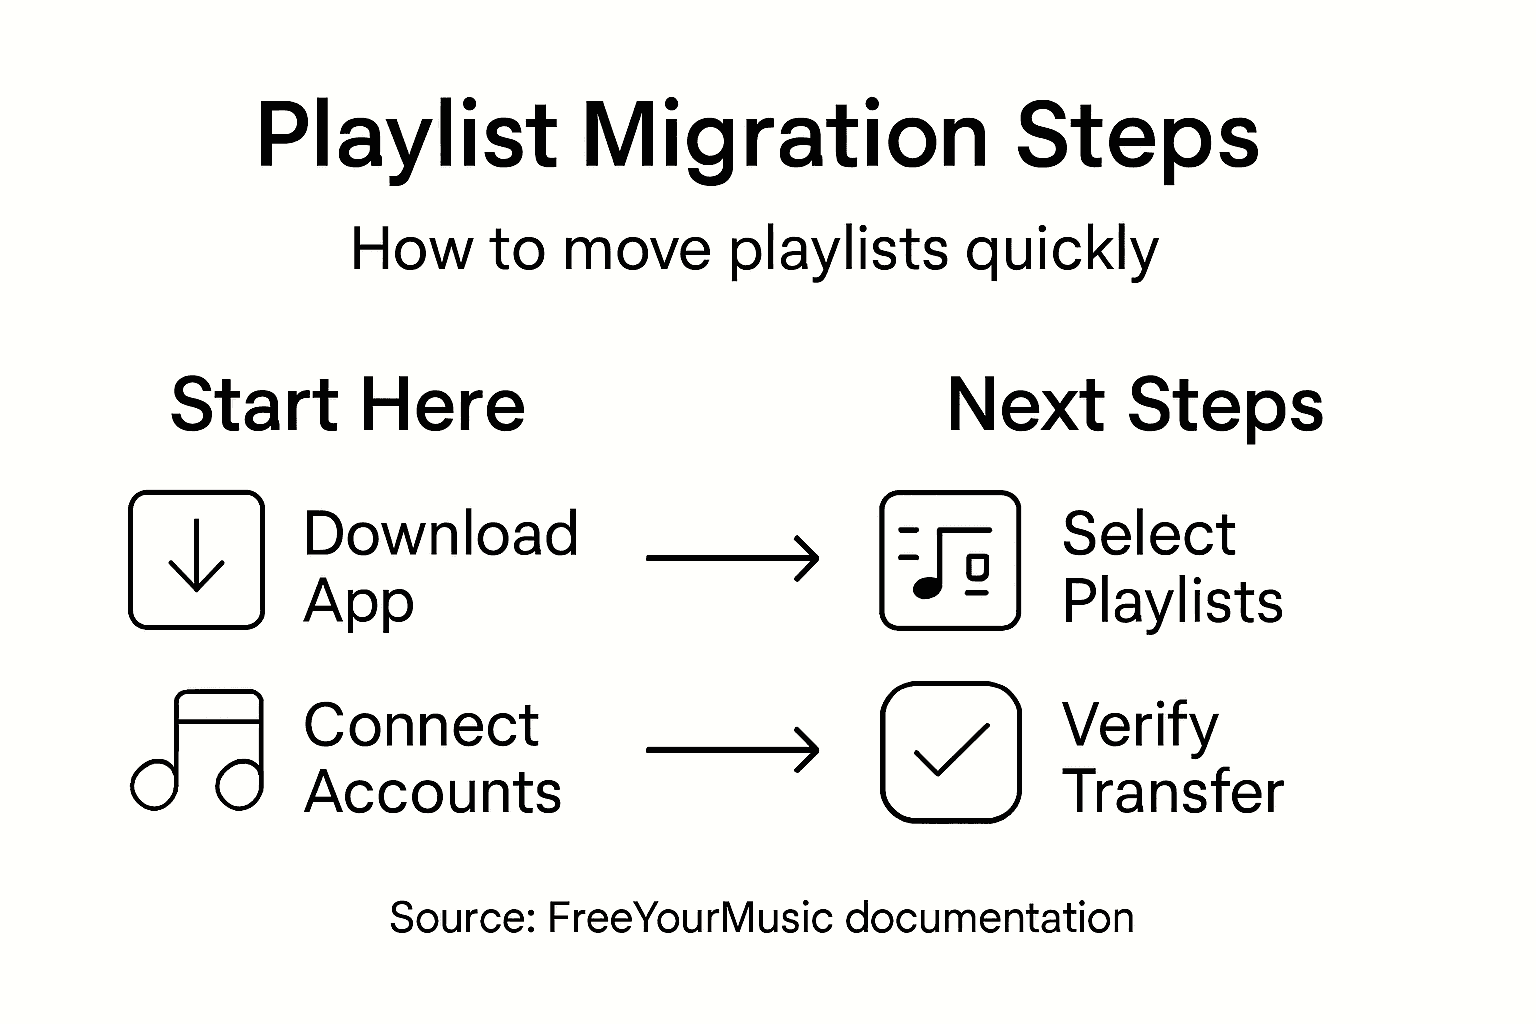
Workflow for Music Migration: Move Playlists Easily
May 18, 2026
Switching between Spotify, Apple Music, or Tidal can feel daunting when your playlists represent years of thoughtful curation. Music enthusiasts and DJs want every mix, remix, and hidden gem to follow them to new platforms without security worries or complex setup. Using a solution like Free Your Music, which supports a wide range of devices and uses secure tokens for account authentication, gives you control and peace of mind while making the process refreshingly simple.
Table of Contents
- Step 1: Set Up Free Your Music on Your Device
- Step 2: Connect Source and Target Streaming Accounts
- Step 3: Select and Transfer Playlists Seamlessly
- Step 4: Verify Playlist Integrity After Migration
Quick Summary
| Key Point | Explanation |
|---|---|
| 1. Download Free Your Music App | Visit the official website or app store to obtain Free Your Music for your device. It supports multiple platforms for easy integration. |
| 2. Connect Streaming Accounts | Authenticate each music service you use with secure credentials to enable Free Your Music to access your playlists for migration. |
| 3. Select Playlists to Transfer | Choose specific playlists for migration and review details to ensure you are moving the correct content before starting the transfer. |
| 4. Verify Transferred Playlists | After migration, check track counts and playlist information on your target service to ensure everything transferred correctly and matches expectations. |
| 5. Use Smart Matching Algorithms | Utilize the app's smart matching feature to recover tracks that may not have an exact version on the target service, ensuring a fuller playlist transfer. |
Step 1: Set Up Free Your Music on Your Device
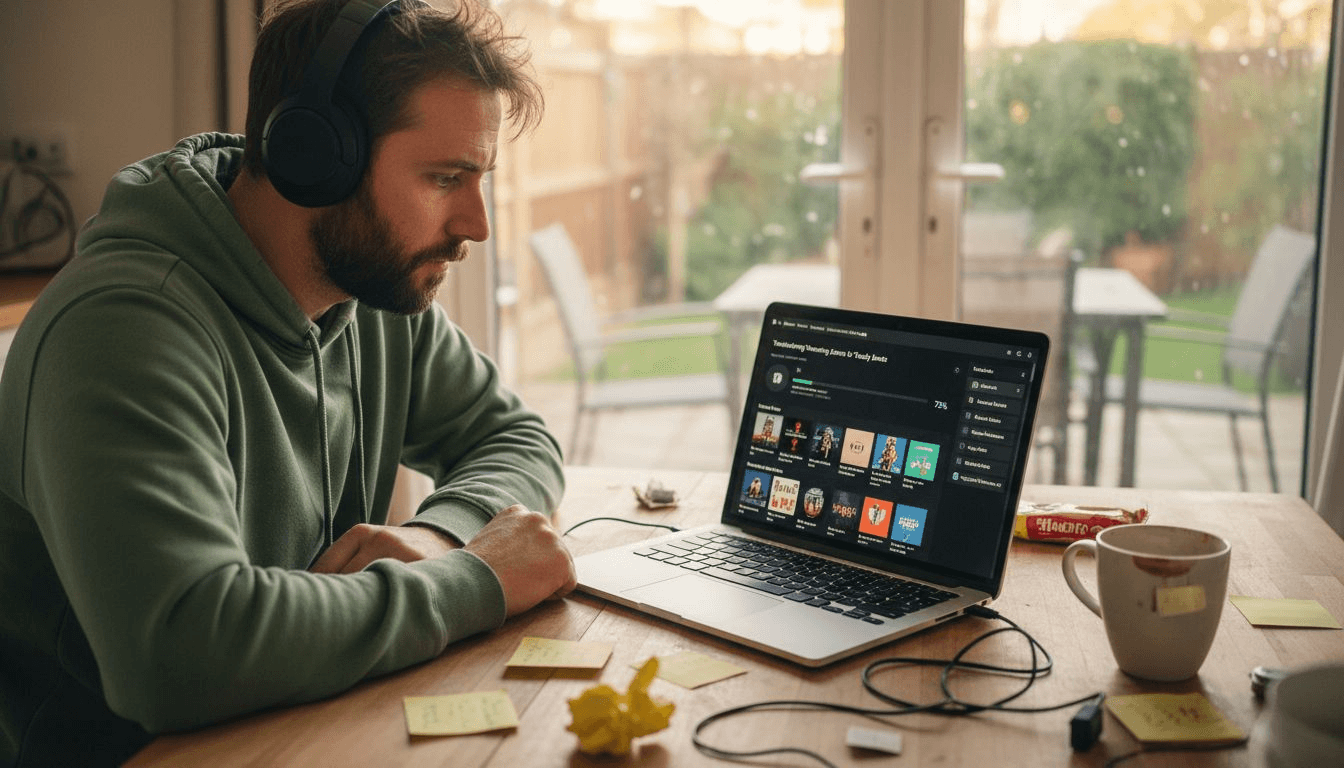
Setting up Free Your Music takes just a few minutes and opens the door to seamless playlist migration. You'll download the app, connect your streaming accounts, and be ready to transfer your music library across platforms.
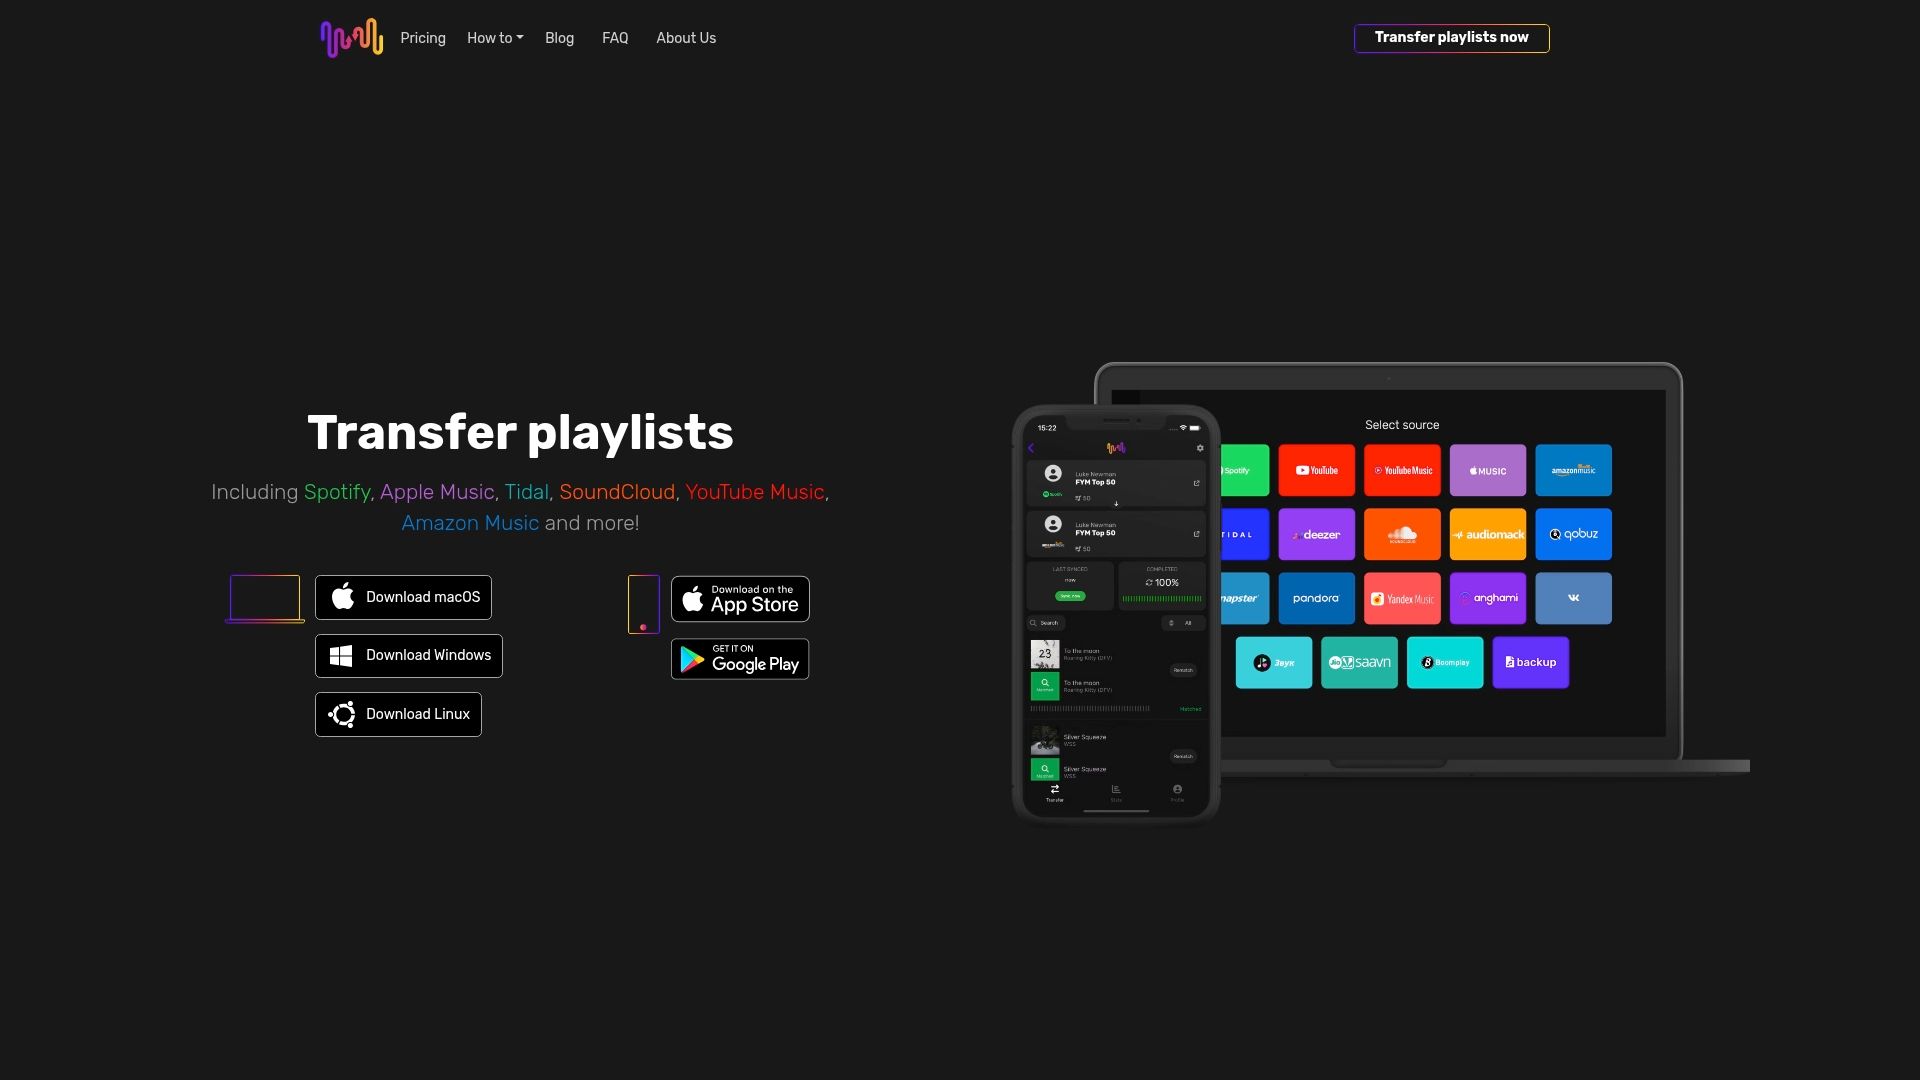
Start by visiting the official Free Your Music website or your device's app store to download the application. The platform supports Windows, macOS, Linux, Android, and iOS, so you can set up on virtually any device you use for music.
Once the app is installed, authenticate your streaming accounts. Launch Free Your Music and connect each streaming service by signing in with your credentials. This gives the app permission to access your streaming playlists and prepare them for transfer.
Here's what you'll connect:
- Spotify account credentials
- Apple Music or iTunes account details
- Other streaming services (Tidal, YouTube Music, Amazon Music, etc.)
- Any local music libraries you want to include
The authentication process is straightforward. Each service uses standard login procedures, and you control which accounts have access to the app. Your credentials are never stored; Free Your Music uses secure tokens to communicate with each platform.
After connecting your accounts, you'll see your playlists and music collections appear in the app. This is your signal that everything is linked correctly and ready for the next stage.
Here's a quick overview of streaming platforms supported by Free Your Music and their key characteristics:
| Platform | Device Compatibility | Common Use Case |
|---|---|---|
| Spotify | Windows, macOS, iOS, Android | Curating and sharing playlists |
| Apple Music | Windows, macOS, iOS | Personal music collections |
| YouTube Music | Windows, macOS, iOS, Android | Integrating video and audio |
| Tidal | Windows, macOS, iOS, Android | High-fidelity audio streaming |
| Amazon Music | Windows, macOS, iOS, Android | Alexa voice integration |
Once your accounts are connected, you have full visibility into all your playlists before transferring anything, giving you complete control over what moves.
Pro tip: Connect all your accounts at once during setup rather than adding them one at a time later, as this gives you a complete overview of your music library and helps you plan which playlists to prioritize for transfer.
Step 2: Connect Source and Target Streaming Accounts
Now you'll connect the accounts you're transferring from and transferring to. This is where the magic happens because Free Your Music needs permission to read from your current service and write to your destination platform.
Start with your source account, which is the streaming service where your playlists currently live. This might be Spotify if you're leaving it, or Apple Music if you're consolidating from multiple services. Sign in with your credentials and authorize Free Your Music to access your playlists.
Next, add your target account, which is where your playlists will land. If you're switching to Apple Music from Spotify, Apple Music becomes your target. The authorization process is identical: sign in and grant permission.
Here's what happens during authorization:
- Free Your Music reads your playlist names, songs, and organization
- The app receives permission to create new playlists on your target service
- Your login credentials are verified but never stored by the platform
- Secure tokens allow Free Your Music to communicate with each service
You can connect multiple source accounts and target accounts if needed. This is useful if you're consolidating music from Spotify and YouTube Music into Apple Music, or managing accounts across different regions.
Once both accounts are connected, Free Your Music analyzes your music libraries and shows you exactly what's ready to transfer. You'll see your playlists listed with information about song matching and any potential issues before transfer begins.
The ability to connect multiple source and target accounts means you can consolidate your entire music collection into one place, even if your songs are scattered across different streaming services.
Pro tip: If you're worried about accidentally overwriting existing playlists, create a test playlist on your target account first—this lets you verify the transfer process works correctly before moving your entire music library.
Step 3: Select and Transfer Playlists Seamlessly
This is where you choose which playlists to move and initiate the transfer. Free Your Music makes the selection process intuitive, showing you all available playlists with details about what will transfer.
Open the Free Your Music app and view your playlist library from the source account. You'll see a list of all your playlists with information about track counts and any potential matching issues. Select the playlists you want to transfer by checking the boxes next to each one.
You don't have to transfer everything at once. Many DJs and music enthusiasts choose to move their most important playlists first, then transfer others later. This approach lets you verify the quality of the transfer before committing your entire collection.
The selection process includes these options:
- Choose individual playlists or select all playlists at once
- Review track counts and playlist details before confirming
- Preview which songs might have matching issues
- Decide whether to transfer playlist order and structure
- Set whether to update existing playlists or create new ones
Once you've selected your playlists, Free Your Music uses smart matching algorithms to find songs in your target service. These algorithms handle remixes, live versions, and alternate editions so you capture as many tracks as possible.
After confirming your selections, the transfer starts automatically. You can watch the progress in real-time as Free Your Music moves your playlists to the destination platform. Most transfers complete within minutes, depending on playlist size.
Smart matching means you'll recover tracks even when exact versions don't exist on your target service, minimizing the gaps in your transferred playlists.
Pro tip: Start with one or two smaller playlists as a test run to see how well the matching works, then transfer your larger collections once you're confident in the results.
Step 4: Verify Playlist Integrity After Migration
Once your playlists have transferred, it's time to verify everything arrived correctly. This quality check ensures your music library is complete and ready to enjoy on your new platform.
Open your target streaming account and navigate to your playlists. Compare the track counts between your source and destination playlists. Free Your Music shows you exactly how many tracks transferred, so you can identify any gaps quickly.
Listen through key sections of your transferred playlists. Pay special attention to the opening and closing tracks, plus any songs you distinctly remember. This spot-checking approach helps you catch any missing or mismatched tracks without reviewing every single song.
Here's what to check during verification:
- Track counts match or are close to your source playlists
- Playlist names transferred correctly
- Song order is preserved as intended
- Artists and album information display properly
- Collaborative playlists show the correct contributors
If you notice missing tracks, don't worry. Following best practices in playlist migration helps you understand why certain songs might not transfer. Some tracks might not exist on your target service, or they may be listed under different artists or titles.
Free Your Music provides a rematch tool for songs that didn't transfer perfectly. This feature lets you manually match problematic tracks or find alternative versions available on your target platform. It's especially useful for independent artists or obscure releases.
For best results during and after playlist migration, keep these troubleshooting insights in mind:
| Issue Detected | Likely Cause | Recommended Solution |
|---|---|---|
| Missing songs | Not available on target platform | Search for alternatives or rematch |
| Incorrect playlist order | Transfer settings not preserved | Enable order retention in settings |
| Mismatched artist info | Song listed under alternate artist | Use manual rematch feature |
| Incomplete collaboration | Service does not support feature | Re-invite collaborators if needed |
After verification, your playlists are ready to use. Many users celebrate this moment by creating a new playlist featuring their favorite transferred tracks, giving themselves a fresh start on their new streaming home.
Complete verification prevents the frustration of discovering missing songs weeks later during your commute or DJ set.
Pro tip: Export a backup of your source playlists before deleting them from your old streaming account, giving you a safety net if you need to re-transfer specific songs later.
Simplify Your Playlist Migration Today with Free Your Music
Migrating music playlists across streaming platforms can feel overwhelming with the worry of missing tracks, lost playlist structures, or tangled account connections. This detailed workflow highlights common challenges like seamless account authentication, smart song matching, and thorough post-transfer verification. Free Your Music tackles these pain points head-on by providing a user-friendly application that preserves playlist order, supports multiple accounts, and uses advanced algorithms to maximize song matches.
Experience the relief of transferring your Spotify, Apple Music, Tidal, YouTube Music, or Amazon Music playlists without manual rebuilding or guesswork. Let FreeYourMusic.com be your trusted partner for effortless music migration across Windows, macOS, Linux, Android, and iOS devices.
Ready to move your playlists with confidence and speed Take control of your music library now by visiting FreeYourMusic.com to get started. Explore how easy migration can be with features like auto-syncing, cloud backup, and unlimited playlist transfers. Don’t let complicated transitions hold you back from enjoying your favorite music where you want it. Step into your new streaming home today with Free Your Music.
Frequently Asked Questions
How do I set up Free Your Music for music migration?
To set up Free Your Music, download the application from the official website or your device's app store. Install the app, then authorize your streaming accounts by signing in with your credentials to connect them, allowing you to access your playlists for transfer.
What steps should I follow to connect my source and target streaming accounts?
Start by signing into your source account, which is the streaming service you are transferring from, and authorize Free Your Music to access your playlists. Next, log into your target account, granting the app permission to create new playlists, ensuring both accounts are linked correctly for the migration.
Can I select specific playlists to transfer, or do I have to move everything at once?
You can choose specific playlists to transfer instead of moving everything at once. Select the playlists you want to migrate by checking the boxes next to each one in the app, allowing you to prioritize important collections first.
How can I verify that my playlists have transferred correctly?
After the transfer, check your target streaming account to compare track counts and listen to key sections of your playlists. Pay attention to any discrepancies in song order or artist information, and use the app’s rematch tool if you find any missing tracks.
What should I do if I notice missing tracks after migration?
If you discover missing tracks, search for alternatives within your target platform or use the rematch feature to manually match problematic songs. This step can enhance the completeness of your transferred library, ensuring you have the music you love.
Recommended
- Free Your Music - Understanding Best Practices in Playlist Migration
- Free Your Music - Effortless Music Collection Transfer Steps for Streamlined Migration
- Free Your Music - Why Playlist Migration Is Worth It: Benefits and Explanation
- Free Your Music - Benefits of Playlist Migration: Consent and Explanation
Migrate from and to any music services


Most popular Apple Music transfers: