Music Service Transition Workflow: Seamlessly Transfer Playlists
May 18, 2026

Swapping Spotify for Apple Music can feel daunting when your playlists have grown into the hundreds. Music lovers across North America often struggle to protect their curated collections while avoiding tedious manual work. This guide helps you use a reliable, automated solution to move your entire library and keep your favorite tracks organized. Playlist accuracy and library structure are at the heart of a smooth transition, so you can enjoy your music on your new platform without missing a beat.
Table of Contents
- Step 1: Prepare Accounts and Organize Playlists
- Step 2: Install and Launch Free Your Music Application
- Step 3: Select Source and Destination Music Services
- Step 4: Customize Transfer Settings and Start Migration
- Step 5: Verify Playlist Accuracy and Library Structure
Quick Summary
| Key Insight | Explanation |
|---|---|
| 1. Organize Playlists Beforehand | Conduct a thorough review of existing playlists to prevent losing cherished tracks during migration. |
| 2. Ensure Account Compatibility | Verify both source and destination streaming service accounts to ensure successful migration access. |
| 3. Use Free Your Music for Transfer | Download and install the Free Your Music application to facilitate an efficient playlist transfer process. |
| 4. Customize Transfer Settings | Adjust key parameters in the app to ensure your playlists migrate accurately and efficiently. |
| 5. Verify Post-Migration Accuracy | Check track counts, metadata, and playlist order after migration to ensure everything transferred correctly. |
Step 1: Prepare Accounts and Organize Playlists
Preparing for a music service transition requires strategic playlist organization and account management. By methodically approaching your playlist migration, you can ensure a smooth transfer of your entire music library without losing any cherished tracks or custom arrangements.
Start by conducting a comprehensive review of your existing playlists. Open your current music streaming service and take inventory of all playlists. This means carefully examining each playlist's content, noting any unique or rare tracks that might be challenging to re-add. Playlist organization strategies can help streamline this process by categorizing your music more effectively.
To prepare for transfer, follow these key steps:
- Backup your current playlist data
- Remove duplicate tracks across playlists
- Verify song availability across target platforms
- Create a master spreadsheet of playlist contents
- Check song metadata for accurate matching
Before initiating the transfer, log into both your source and destination music streaming accounts. Ensure you have active subscriptions and updated login credentials. Some platforms require specific authentication methods, so double-check compatibility and access permissions.
Successful music library migration starts with meticulous preparation and systematic playlist management.
Pro tip: Create a temporary backup playlist in your target streaming service to test transfer compatibility before migrating your entire music collection.
Step 2: Install and Launch Free Your Music Application
Installing the Free Your Music application is your gateway to seamless music library transfers across different streaming platforms. This step will guide you through downloading, installing, and launching the application on your preferred device.
Begin by visiting the official website and locating the download section for your specific operating system. Music converter tools can simplify the migration process, so ensure you're downloading the correct version compatible with your computer or mobile device. The download process typically involves these key steps:
- Select your operating system
- Download the installation file
- Run the installer
- Grant necessary permissions
- Complete initial setup
Once downloaded, the installation process is straightforward. Double-click the installer and follow the on-screen prompts. Most users will need to:
- Accept the terms of service
- Choose an installation location
- Create a user account or log in
- Authorize application permissions
Successful application installation sets the foundation for a smooth music library migration.
After installation, launch the application and connect your existing music streaming accounts. This initial setup is crucial for enabling the transfer process.

Pro tip: Always download the application directly from the official website to ensure you have the most recent version and avoid potential security risks.
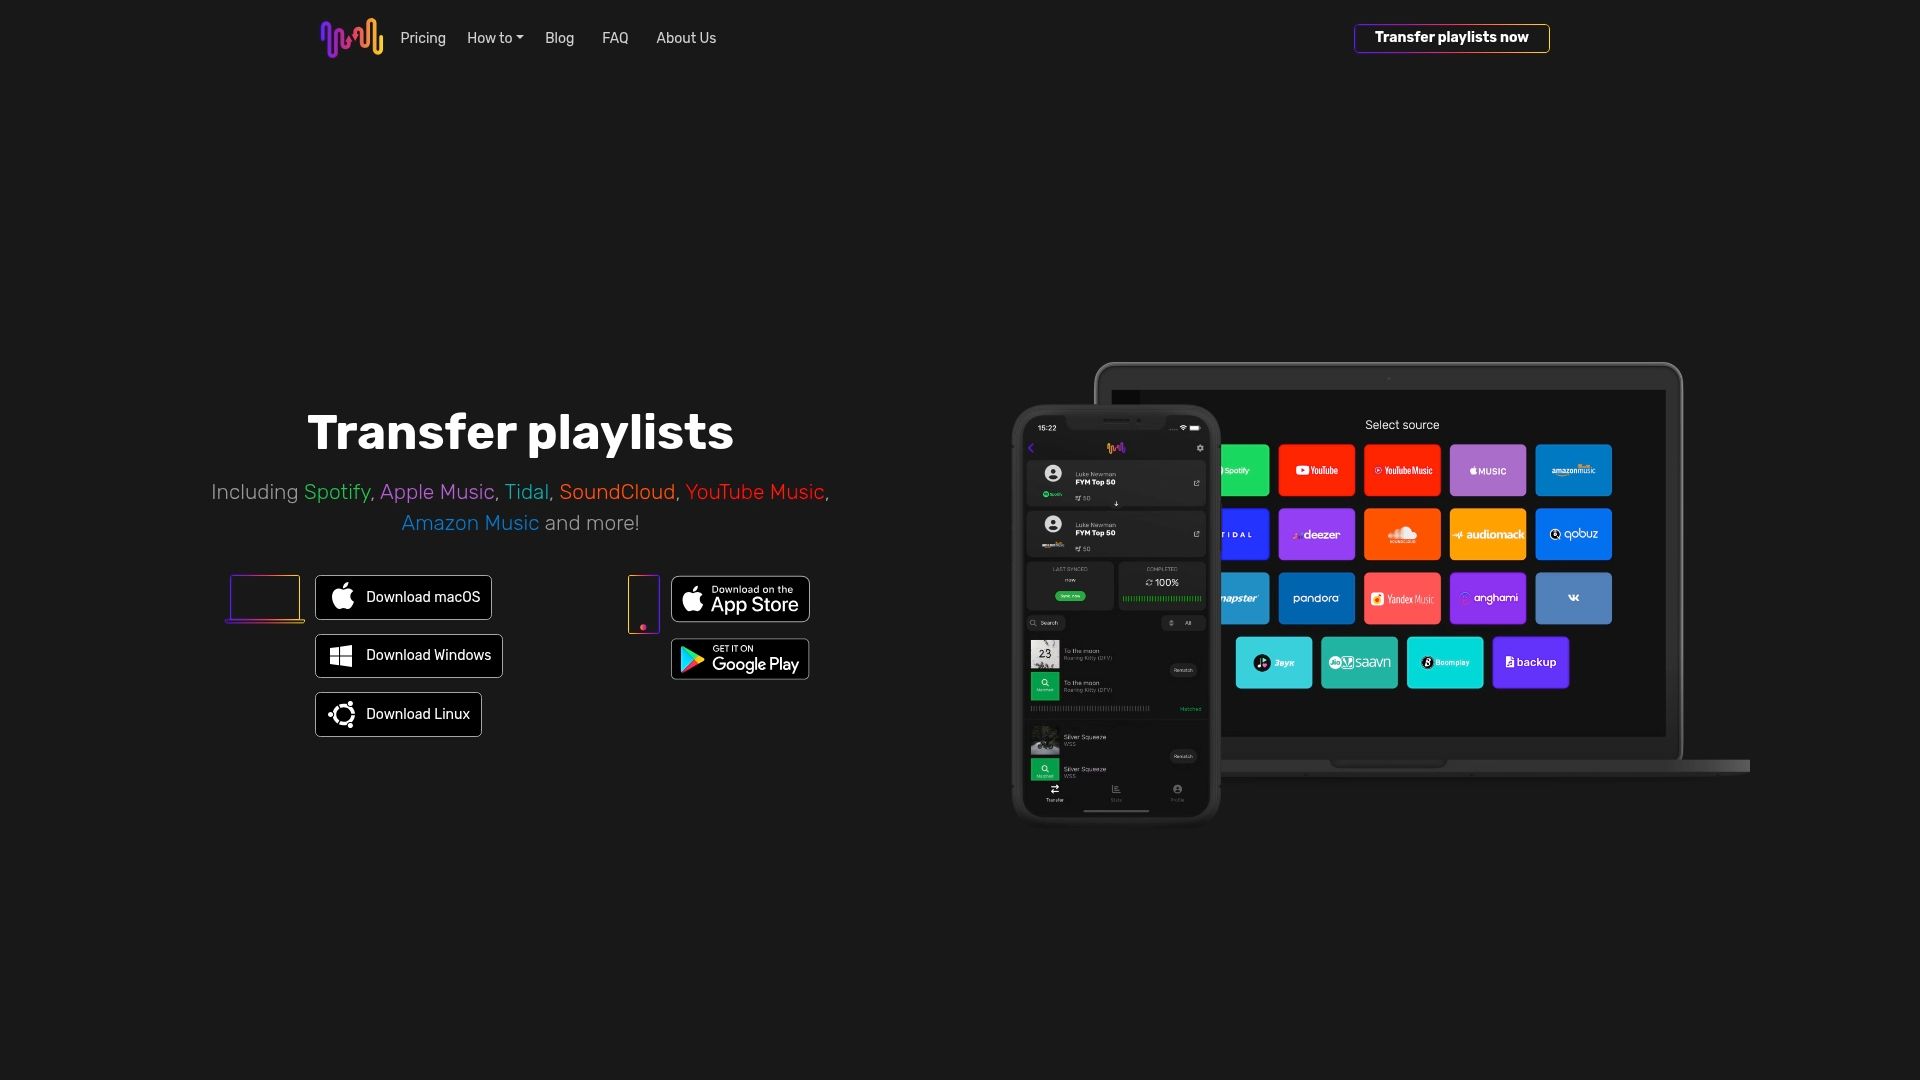
Step 3: Select Source and Destination Music Services
Selecting the right source and destination music services is a critical step in your playlist migration journey. Music migration platforms offer diverse options for transferring your beloved music library across different streaming services.
Begin by identifying the source platform where your current playlists are stored. This is typically the music streaming service you are currently using, such as Spotify, Apple Music, Tidal, or YouTube Music. Carefully log into this account and ensure you have full access to your complete music library.
When choosing your destination service, consider these important factors:
- Availability of your favorite tracks
- Music library size and compatibility
- Subscription cost and features
- Platform-specific music recommendations
- Device and ecosystem integration
The transfer process requires you to authorize access for both your source and destination music services. This means:
- Log into your current music platform
- Select the destination streaming service
- Review account compatibility
- Verify authentication permissions
- Confirm transfer settings
Successful music service transitions depend on thorough account preparation and compatible platform selections.
Before finalizing your selection, verify that your destination service supports most of the tracks in your existing playlists to minimize potential content loss during migration.
Here's a quick comparison of popular music streaming services for playlist migration:
| Platform | Track Availability | Library Size Limit | Unique Transfer Challenge |
|---|---|---|---|
| Spotify | Very high | 10,000 tracks | Some regional tracks missing |
| Apple Music | High | 100,000 tracks | Strict DRM on some songs |
| Tidal | Moderate | 10,000 tracks | Varying catalog per country |
| YouTube Music | High | No stated limit | Remixes/covers may mismatch |
Pro tip: Create a small test playlist first to validate the transfer process and ensure your music migrates correctly before moving your entire library.
Step 4: Customize Transfer Settings and Start Migration
Customizing your music library transfer settings is a critical phase that determines how precisely your playlists will migrate between streaming platforms. Music library synchronization involves nuanced configuration to preserve your musical experience.
The transfer settings menu provides several customization options to fine-tune your playlist migration. You'll want to carefully review and adjust these key parameters:
- Playlist transfer mode (full or partial)
- Track matching preferences
- Metadata preservation settings
- Duplicate track handling
- Playlist order retention
To start the migration process, follow these detailed steps:
- Select your transfer preferences
- Choose conflict resolution strategies
- Preview potential transfer outcomes
- Verify source and destination playlist compatibility
- Initiate the transfer
Meticulous configuration ensures a smoother, more accurate music library transition.
Depending on your library size, the transfer might take several minutes to complete. The application will provide real-time status updates and alert you to any potential issues during the migration process.
Pro tip: Always keep a backup of your original playlists before initiating a large-scale music library transfer, just in case you need to revert or verify the migration.
Step 5: Verify Playlist Accuracy and Library Structure
Verifying your newly transferred music library ensures that your carefully curated playlists remain intact and fully functional in the new streaming service. Music library synchronization requires meticulous attention to detail to preserve your musical collection's integrity.
To comprehensively verify your playlist transfer, you'll need to perform a systematic review across multiple dimensions. Pay close attention to these critical verification points:
- Total number of tracks in each playlist
- Song order and sequence
- Metadata accuracy (artist, album, year)
- Playlist folder structures
- Custom playlist names and tags
Execute a thorough verification process using these strategic steps:
- Compare playlist track counts
- Manually review first and last tracks
- Check for missing or replaced songs
- Validate playlist folder organization
- Test playlist playback functionality
Precise verification prevents potential music library disruptions and ensures a seamless listening experience.
If you discover any discrepancies during your review, most migration tools offer built-in resolution features to help you manually adjust and correct any transfer inconsistencies.
Refer to this summary for playlist accuracy checks after migration:
| Verification Aspect | Why It Matters | Example Issue Detected |
|---|---|---|
| Track count per playlist | Confirms completeness | Fewer songs than original |
| Metadata accuracy | Ensures correct information | Artist or album incorrectly displayed |
| Playlist folder order | Maintains original structure | Playlists assigned to wrong folders |
| Song order | Preserves curated sequences | Favorite songs moved to end of list |
Pro tip: Create a temporary backup playlist in your original service before initiating any corrections, providing an additional safety net for your music collection.
Simplify Your Playlist Transfer Today with Free Your Music
Transitioning your music service can feel overwhelming, especially when carefully curated playlists risk being lost or altered. This article breaks down key challenges like playlist organization, accurate track matching, metadata preservation, and verifying transfer completeness. If you want to avoid the frustration of manual rebuilding and ensure your full music library migrates flawlessly, you need a solution designed for seamless migration across platforms like Spotify, Apple Music, Tidal, and YouTube Music.
Discover how FreeYourMusic.com can make your playlist migration effortless with powerful features such as automated synchronization, unlimited playlist transfers, and multi-account support. Start by installing our user-friendly app on macOS, Windows, Linux, Android, or iOS. Take control of your music transition workflow with confidence and enjoy uninterrupted listening on your new service. Don’t wait until you lose tracks or playlists — visit Free Your Music now and experience the most reliable and secure playlist transfer solution available.
Learn more about music migration platforms and music converter tools to make an informed switch today.
Frequently Asked Questions
How do I prepare my playlists for a music service transition?
To prepare your playlists, start by taking inventory of all playlists in your current music streaming service. Back up your playlist data, remove duplicates, and create a master spreadsheet of the contents to ensure a smooth transfer.
What steps should I follow to install the Free Your Music application?
Begin by visiting the official website and downloading the application compatible with your operating system. Follow the installation prompts, accept the terms of service, and create a user account to get started.
How do I select the source and destination music services for my playlists?
Log into your current music platform to identify the source service where your playlists are stored. Then, consider factors such as track availability and subscription features to choose the right destination music service before initiating the transfer.
What transfer settings should I customize before starting my music library migration?
Customize settings such as playlist transfer mode, track matching preferences, and duplicate track handling to refine your migration. Adjust these settings based on your music collection size and organization to ensure an accurate transfer.
How can I verify the accuracy of my playlists after migration?
Verify your playlists by comparing the total number of tracks, checking metadata accuracy, and ensuring the playlist structure remains intact. Conduct a manual review to identify any missing songs or discrepancies, correcting them as needed for a seamless listening experience.
What should I do if I find discrepancies in my transferred music library?
If you find discrepancies, you can usually use the built-in features of your migration tool to make adjustments. Review your original playlists and make necessary corrections to ensure everything matches, maintaining a smooth music library flow.
Recommended
Migrate from and to any music services


Most popular Apple Music transfers: